A Guide to Finding the Perfect Kettlebell

In the ever-evolving world of fitness, one tool has maintained its popularity for centuries: the kettlebell. Kettlebell training offers a dynamic and effective way to build strength, improve endurance, and enhance overall fitness. In this comprehensive guide, we’ll delve into the benefits of kettlebell training and provide you with valuable insights on how to select the right type of kettlebell for your fitness journey.

32kg kettlebell

The Benefits of Kettlebell Training

1. Full-Body Conditioning: One of the primary advantages of kettlebell training is its ability to provide a full-body workout. Unlike traditional weightlifting, which often isolates specific muscle groups, kettlebell exercises engage multiple muscle groups simultaneously. This results in a more efficient and functional form of strength training.

2. Cardiovascular Fitness: Kettlebell workouts are intense and can elevate your heart rate, making them an excellent choice for cardiovascular conditioning. The combination of strength and cardio in one session can help improve your overall fitness level.

3. Improved Core Strength: Many kettlebell exercises require a stable and engaged core to perform correctly. As a result, kettlebell training can help strengthen your core muscles, leading to better posture and reduced risk of lower back pain.

4. Functional Strength: Kettlebell movements often mimic real-life activities, making them highly functional. Whether you’re lifting groceries, playing sports, or carrying your child, the strength gained from kettlebell training is directly applicable to daily life.

5. Time-Efficient Workouts: Kettlebell training allows you to achieve a challenging workout in a relatively short amount of time. This is perfect for individuals with busy schedules who still want to prioritize their fitness.

Selecting the Right Kettlebell

Choosing the right Dangerously Fit kettlebell is crucial to ensure a safe and effective training experience. Here are some key factors to consider:

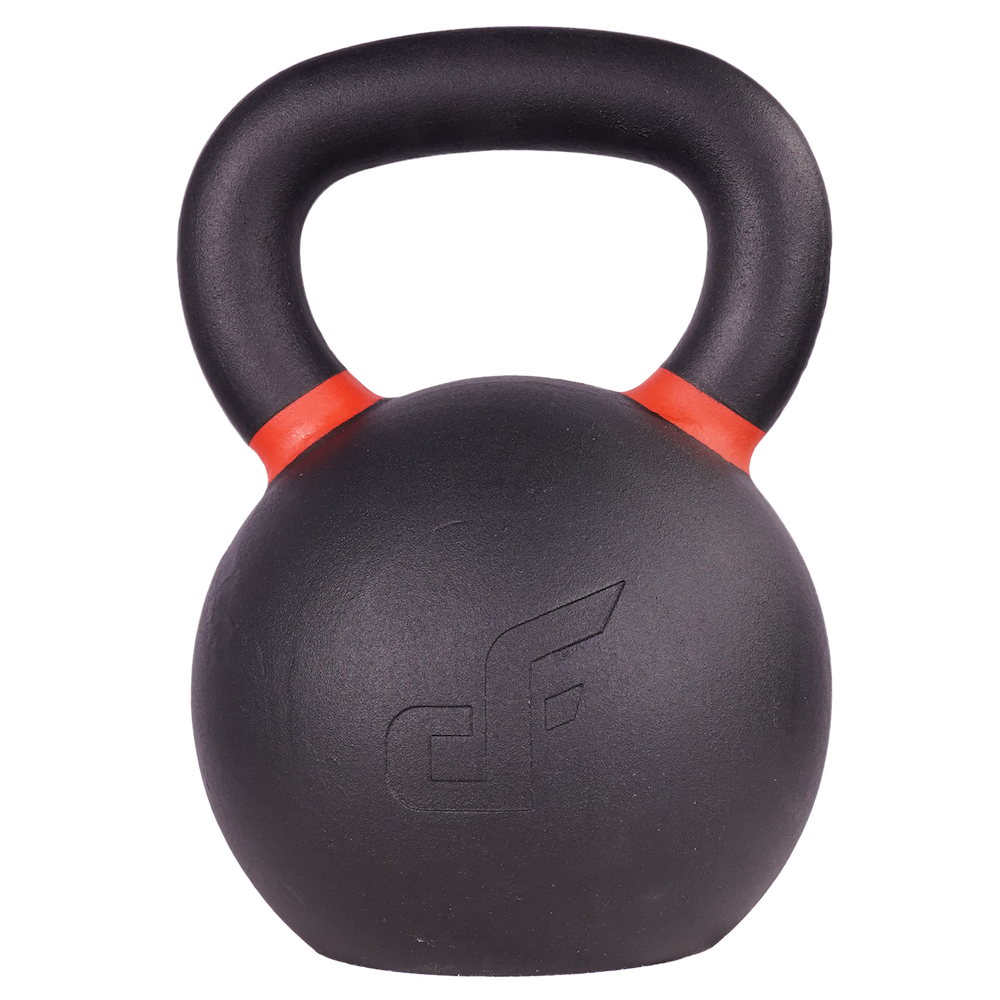
1. Weight: Kettlebells come in a range of weights, typically measured in pounds or kilograms. The weight you choose depends on your fitness level, goals, and the specific exercises you plan to perform. As a general guideline, start with a kettlebell that is 8-16 kilograms (18-35 pounds) for women and 16-32 kilograms (35-70 pounds) for men. Experiment with different weights to determine the one that challenges you without compromising your form.

2. Handle Size: The handle is a critical aspect of the kettlebell. It should have enough space to comfortably accommodate your hand, allowing for a secure grip. A handle with a smooth, powder-coated finish is often preferred as it minimizes the risk of blisters.

3. Handle Shape: The shape of the handle can vary among different kettlebells. Some have a traditional “bell” shape, while others have a more rectangular handle. The choice largely depends on personal preference. Try both styles to determine which one feels more comfortable during your workouts.

4. Material: Kettlebells are typically made from either cast iron or steel. Cast iron kettlebells are more budget-friendly and suitable for most people’s needs. Steel kettlebells are often more expensive but have a smoother finish and are more durable.

5. Quality: Invest in high-quality kettlebells from reputable brands to ensure durability and safety. Poorly made kettlebells can have sharp edges or uneven weight distribution, which can lead to injury.

6. Single or Set: Decide whether you want a single kettlebell or a set. Beginners can start with a single kettlebell, while those looking to progress can invest in a set with different weight options.

Kettlebell Exercises for Beginners

If you’re new to kettlebell training, here are some beginner-friendly exercises to get you started:

1. Kettlebell Swing: The kettlebell swing is a fundamental exercise that targets the posterior chain (hips, glutes, and lower back) and improves explosive power. Start with a light kettlebell and focus on proper form before progressing to heavier weights.

2. Goblet Squat: The goblet squat is an excellent lower-body exercise that also engages the core. Hold the kettlebell close to your chest and perform squats while maintaining an upright posture.

3. Kettlebell Deadlift: The deadlift with a kettlebell is a great way to strengthen the entire body, particularly the back and legs. Ensure your form is correct to prevent injury.

4. Turkish Get-Up: The Turkish get-up is a complex but highly effective exercise that works on strength, stability, and mobility. It’s best learned with a qualified instructor.

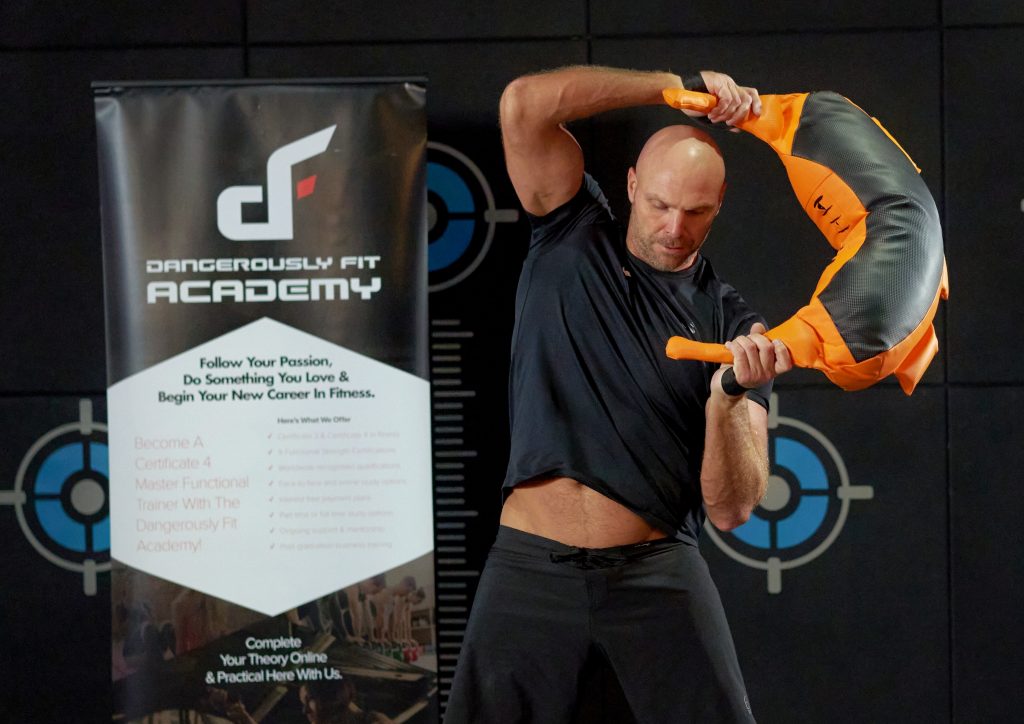
5. Kettlebell Halo: This exercise helps improve shoulder mobility and stability. Hold the kettlebell by the handle and move it in a circular motion around your head.

Get more more kettlebell exercise instructions at: http://www.steelmace.co.nz/kettlebell-certification-course-new-zealand/

Safety Precautions

As with any form of exercise, safety should be a top priority when training with kettlebells. Here are some safety precautions to keep in mind:

1. Start Slow: Begin with lighter weights and gradually increase the load as your form and strength improve.

2. Proper Form: Ensure you learn the correct form for each exercise to prevent injury. Consider working with a certified kettlebell instructor if you’re new to kettlebell training.

3. Warm-Up: Always warm up before a kettlebell workout to prepare your muscles and joints for the movements.

4. Rest and Recovery: Allow your muscles to recover between workouts to prevent overtraining and reduce the risk of injury.

5. Listen to Your Body: Pay attention to your body’s signals. If you experience pain or discomfort during a kettlebell exercise, stop immediately and seek guidance.

Kettlebell training is a versatile and effective way to enhance your strength, endurance, and overall fitness. When selecting the right kettlebell, consider factors like weight, handle size, shape, material, and quality.

Whether you’re a beginner or an experienced fitness enthusiast, incorporating kettlebell exercises into your routine can help you achieve your fitness goals and unlock the many benefits of this ancient yet timeless fitness tool. Remember to prioritize safety, proper form, and gradual progression to make the most of your kettlebell training journey.

Beginner Steel Clubbell Workout

This steel clubbell workout consists of 50 seconds of work and a 10-second rest, with four exercises in total. Power through all of them.

I like to train with the Maverick Bamboo Indian clubbell, but a steel clubbell will suffice.

The steel clubbells circuit will take you four minutes to complete, and once you’ve finished one side, change your grip and repeat the exercises on the other side. Repeat the four exercises again for four minutes. After completing both sides, take a 60-second rest, then move on to the second set. This will give you four minutes of work on each arm, totaling 16 minutes of exercise with a 60-second transition rest in between. In total, the workout will last about 17 minutes.

Now let’s go through the exercises. The first one is the arm cast: keep your elbow tucked in at a 90-degree angle, shoulder down, hold the club in the hammer grip, muzzle pointing to the sky, put it in your back pocket, ensuring your elbow stays close to your ear. Avoid flaring out your ribs, pull down from the lap, bringing the elbow back to the starting position. Keep your abs tight and glutes engaged, lower the club into the ordered position. Perform this for 50 seconds, followed by a 10-second rest.

Next, we have the swing squat. Stand with your feet slightly wider apart, swing the club forward, catch it at the bottom position, swing and catch. Try to keep your forearms parallel to the floor, arm staying up at shoulder height, elbows locked out, shoulders down. Repeat this for 50 seconds, then rest for 10 seconds.

Moving on to the flag press: begin in the ordered position, hold the club with a hammer grip, drive the club forward and up away from your body. If needed, extend your hand to the side for added stability. Draw back your shoulder blade, squeeze through, pull the elbow back into the ordered position. Press forward and up, then squeeze through and return. Perform this for 50 seconds, followed by a 10-second rest.

Lastly, we have the clock squat. Cast the clubbell out to the side, perform a full 360-degree rotation, catch it on the opposite shoulder, cast out again. Repeat this for 50 seconds, followed by a 10-second rest. Then switch to the left side and perform all four exercises on that side. Afterward, take a 60-second rest and prepare for your next round.

That wraps up today’s workout. I hope you enjoyed it, and I’ll see you in the next one. Thanks!

P.S. Want more clubs and maces workouts?

Check out: https://www.maverickmace.com/

Getting Started With Battle Rope Training

Is a battle rope worth it?

Battle ropes can give you the ultimate workout! They are an excellent tool to use when trying lose weight, gain muscle mass or tone your existing muscles. You’ll find them particularly effective if they’re part of a stronger programme that focuses on different areas than just fitness and strength training because then it will help with building endurance as well.

What muscles does the battle rope work?

Battle ropes are a great way to get in shape, and they work your entire body. You’ll be doing exercises that will make all those muscles you usually neglect feel like they’re getting some attention too! Battle rope workouts are a great way for total body fitness. You’ll work your upper and lower bodies as well as the core, with every muscle bearing some burden in this intense exercise routine that will make you feel like nothing else matters!

Are battle ropes good for belly fat?

Battle rope exercises are quickly gaining popularity among gym users. Many celebrities in Hollywood advocate this workout, and experts recommend it for ladies specifically to reduce tummy fat from its excess weight gain during pregnancy or nursing times. Battle rope workouts are an upper-body workout that is fast becoming popular among gym users. Many celebrities in Hollywood have publicly admitted to exercising with the aid of this device, and experts recommend it for women specifically so they can lose weight off their stomachs or other problem areas – like arms! The battle ropes work by providing resistance as you go along which increases your metabolism while giving cardio benefits at same time; these help reduce extra flab on upper portion(s).

Will battle ropes get you ripped?

The battle ropes are a perfect tool to help you get ripped. They will provide all the power, strength and endurance necessary for training in order to become successful at building muscle tissue! When adapting your diet during cutting periods there’s plenty of work that needs doing within our kitchens – but don’t worry because this journey isn’t always easy- everyone has their own style when it comes down how they plan meals or prepare food so what works best with one person may not work similarly on another individual basis.

How heavy should battle ropes be?

Heavier ropes are better for quick, intense workouts. They’ll help you build muscle and explosive strength quickly because of their weight distribution that hits different parts in your body at once! When it comes down to which type is right for a particular workout or activity- there’s no one size fits all answer here folks…but if heavy duty lifting with big moves sounds like just what the doctor ordered then go ahead an get yourself something along those lines – whether its 30′, 40’or 50′.

How long should a battle rope workout be?

We recommend 10 different exercises for the battle ropes performed at 2 minute intervals. Each battle rope exercise should be done for 30 seconds with a 2-minute break before moving onto another routine task or competition!

Do battle ropes need to be anchored?

Battle ropes are a great way to challenge yourself and work on your balance. How do you anchor battle ropes I hear you say, well they don’t have be anchored in one place, so you can use any heavy equipment that’s available at home or even some of the items found inside power racks!

Is battle rope a full body workout?

The battle rope is a great way to work your entire body, but if you want more focus on certain areas like the arms and shoulders then “alternating waves” will be perfect for that.

Power Bag Squats – The Best Leg Exercise?

For those who have never tried Power Bags, you’re in for a treat. These cylinder contraptions deliver smart intense workouts that demand mental focus and full body awareness when picked up by an athlete or fitness enthusiast such as yourself!

In short time these will become your best friend at the gym because they make any session effective with both strength training exercises like squatsdeadlifts motions performed from their center of gravity (or balance point), but also cardio work outs where we burn calories through running which requires good leg oscillation stability due to its high impact nature on our joints if not executed correctly. Squats are the best power bag exercise to build strong powerful legs.

Power bag fitness training is a mind-body experience. These cylinder shapes deliver intense workouts that demand total focus and body awareness, so you’re sure to get in shape when using one of these bad boys!

Power Bags are a fun and effective tool for any fitness enthusiast. They can be used on their own as an all-inclusive workout, or integrated with other functional training tools in circuit style workouts such as Bootcamps – popular among professional athletes like MMA fighters or those serving abroad!

Power backpacks have been especially useful to military personnel who carry heavy loads while running ways abroad – they keep your load distributed across both shoulders rather than one huge weight hanging off of just one shoulder at hyperflexion angle (ouch).

Dangerously Fit are launching their new line of Dangerously Fit Power Bags (5kg-40kg) featuring a rip-resistant cover, triple stitched lining, and foam core. These bags come pre-filled with a fixed-weight allowing for quick transitions and 7 different handles for easy and comfortable gripping.

Want more great content like this? Check out Power Bag Australia on Instagram!

Training For The CrossFit Games

CrossFit is a racing sport wherein the players travel on foot to overcome series of combined military obstacle challenges that include, but not limited to wall climbing, trail crossing, carrying heavy objects, crossing over bodies of water, crawling under ropes or barbed wire and sometimes, jumping over fire.

Other CrossFit activities may also include running and crawling under or over large inverted quarter pipes, slanted walls, a cargo net, and varieties of balancing and hanging obstacles.

Far beyond regular or traditional running, CrossFit is more of an adventure running where sets of friends and families can join together – as a team or individual players. Over the past years, CrossFit has developed into a more complex and difficult sport that aims to test one’s physical, mental and social strength.

Who can join an CrossFit?
The truth is, not everyone is capable of joining a CrossFit competition. People with severe heart problems, high blood pressure, recently undergone surgery, and other serious illnesses are prohibited from joining this competition. For you to join a CrossFit competition, you must be ready for massive, strenuous, and strength-pulling activities ahead.

Your whole body, physical and mental attributes must be in synchronicity and willing to perform those activities with determination and goal to finish the race. How to achieve the physical and mental coordination in preparation for CrossFit? Well, the following articles aim to guide you in determining and pursuing skills and training you need before joining CrossFit.

Physical skills and training
Strengthening your cardiovascular: The best way to start is by conditioning and strengthening your cardiovascular muscles with personal training. Dangerously Fit run special classes, this is by far the best and easiest way to strengthen your cardiovascular since it requires no equipment and you can start anytime you want. When we say running, we mean off the pavement or treadmill. This is the time to get your feet off those comfy run and try to take it to trails and off roads. If you were able to run a marathon before, it can be a good start since you are able to assess how many miles you can run. Running can be combined with other activities like sprinting, climbing hills or stadium stairs.

Strengthening your body as a whole: The next step is to focus on functional and dynamic movements that will help you build your relative strength. As an obstacle racer, you should be strong to manage your body weight as you are expected to swing, crawl, and lift heavy objects. While doing these, you must be able to move your bodyweight over, under, or through obstacles.

Since you are expected to weigh heavy objects during the competition, you must summon all the strength you need to make it to the finish line. Enhance your strength by engaging in a number of bodyweight exercises that are part of the outdoor group fitness program including triceps dips, push-ups, and pull-ups for arms and even the upper body parts. For your legs and thighs, perform series of squats.

Improving your balance: Another skill that you need in joining obstacle race is balance. Balance is an important part of skill you must master when competing for an obstacle race. There will be activities during the run that will attest your balance like crossing distances through a rope or logs. To improve your balance, your legs must be strong enough to carry and endure all your bodyweight over a certain period of time. You can do kettle bell swings and quick but strong movements like burpees, jump squats, and box jumps.

Mastering your footwork: Since you have been running for quiet sometime, you must have learned your footwork ability. As a runner, you must be able to switch directions in a short period of time. We call that in physical fitness as agility. Agility is footwork and presence of mind combined.

You can improve your footwork by striding between targets unevenly placed on the ground. Targets can be placed as rocks, boxes, logs, or fun signs to keep your training more fun and less serious. You can try working on your footwork on level or flat ground first and then upgrade to angled, uphill and rough surfaces.

Mental strength: With all your physical endurance and strength improved, your brain must go with them. Keep your eyes and mind on the goal – and that is to make it to the finish line.

Remember, your body will not move unless your mind tells it to do so.

Fitness Trainer Shares Tips For training With Bulgarian and Power Bags

Everyone knows about the host of benefits which exercising regularly with Bulgarian and Power bags brings but few people know about what restrictions to apply to their workout regime after a major surgery. If you had knee surgery in the past then there is no reason you should stop training with a power bag or Bulgarian bags, but you might have to avoid doing certain kinds of exercises.

The ground rule
When you have undergone knee surgery then it’s imperative to avoid pushing your knees out from a level which exceeds your knees and makes them push forward past the toes. Doing this will put your kneecap under tremendous stress. All kinds of Dangerously Fit Bulgarian bag exercises including aerobic ones and stretches have parts where the knee has to be stretched forward. According to the top fitness trainers it’s important to know what to avoid doing

Deep lunges
Lunges are an important part of strength training but if you had knee surgery recently these should be completely off the schedule for you. A power bag lunge is a position which makes you bend one knee and keep the feet flat on the ground while the other leg is firmly positioned behind your body. Lunges are used in power yoga too. By understanding the position you can also make out the reason why lungs put so much pressure on the knees. Personal trainers advise their clients who have undergone surgery to perform lunges.

Squats
Squats are another form of strength training exercise that virtually makes the whole body weight fall on the lower limbs. The muscles of the hips, quads, thighs and buttocks are hugely benefited by the squat. A squat is performed when the body is pushed downwards in a straight movement while the hands hold a weight. The tendons, ligaments and bones of the lower body are strengthened by this exercise but the squat can easily be called the “most avoidable” exercise for people who are recovering from knee surgery.

bbag

The classic hurdlers stretch
The classic hurdlers stretch will need you to sit on one bent leg while the other leg is extended straight in front of you. You must perform a bending movement and tilt your body backwards. This position requires stretching the medial ligaments puts immense pressure on the knee cap and can lead to dislocation of the meniscus. Personal fitness trainers have classified the Hurdlers Stretch as another avoidable exercise for people who have undergone new surgery.

Full circle knee extensions
The name Full circle/ arc knee extensions is suggestive of pressure on the knees and this exercise is also on the “avoid” list of most Balmoral personal fitness trainers who advise clients about recovering from knee surgery. You can out more at: https://www.dangerouslyfit.com.au/kettlebells/

A personal fitness trainer says that the exercise sounds simple enough as you have to do is to sit comfortably on a chair while one leg is lifted and then again bent down. However this movement puts a lot of stress on the knee joint and is best avoided.

Master The Personal Training Basics Before You Go Online

A Push-up is an exercise performed in a prone position –chest down and back up – to achieve functional movement in the larger muscles of the human body with a person’s own body weight providing the required resistance. Involving controlled and coordinated motion, this popular training is commonly perceived as toning up the pectorals, deltoids and triceps.

If you want to be an online personal trainer, it’s important you learn these basics in face to face becuase teaching online is much more difficult. When I created my online personal training coaching program I told myself that I wanted to have everything 100% correct in my 1-1 personal training first.

However, continuous and varied push-ups when executed using proper technique condition the whole body improving its strength, agility, and flexibility.

Although apparatus-free and simple-looking, there’s a lot more to a press-up than meets the average eye. A personal training expert with his in-depth knowledge of physiology and hands-on experience in instruction helps comprehend the nuances of this rhythmic drill, provides the much-needed motivation for persistence in trials and leads toward the eventual attainment of perfection in form, that which is replicated in every rep.

Below is a brief one-to-one explanation of the technique.
Step #1 – Starting pose (Plank)
Grip the floor well with both hands – palms facing down, fingers forward – aligning the arms below the shoulders. Keeping feet together drill the toes into the ground to create a firm base that will support the frame throughout the activity. Engage the core, squeeze the glutes and flatten the spine. At the end of it all, the entire trunk – right from the head down to the toe – should be stiff and straight.

Step #2 – Going down
Fix the gaze at a point on the floor about 7 to 8 inches ahead of the fingertips so that the torso and neck are kept neutral. Maintaining this gaze, draw the shoulders back and pull down the chest. Continue the restrained drop up to a point of where the thorax is inches away from the ground, ensuring deep inhalation all along.

Step # 3 – Coming up
Keeping the upper body taut, the abdominal muscles activated and hands firmly planted, create torque by twisting the palm on the floor. Exhale – quickly, completely – to tighten the core and power up to the original position.

Do’s and Don’ts
Lock the hips and stiffen the leg to ensure top-to-bottom straightness.

Maintain steadiness of the head.

Avoid a chin tuck-in.

To make the trunk rigid create tension in the lats by compressing the armpit

Neither arch nor sag the back.

Keep the arms pulled away and down, not shrugged up.

To engage the core, don’t just suck in the belly. Instead, tense up the deepest abdominal muscles as if you’re about to cough or receive punches.

Focus on the breath from start to finish.

Word of caution

Though aimed at imparting education on ideal push-up method, the above info can’t replace the technical inputs supplied by a personal training professional nor can it deliver the practical pointers quintessential to the mastery of this wonderful workout. If you are not sure, visit Online Fitness Profits Personal Training and become an expert!

It’s therefore imperative to avail yourself of the services of a specialist whose insight, personalised attention and valuable guidance will make repeated push-ups safe & effective.

A Quick Guide to Turkish Get Up

The Turkish getup is one of those extremely beneficial workouts that should be a part of your sessions with your clients. As a kettlebell trainer, you want to offer the best to your clients and the Turkish getup is right on top as a total body workout that strengthens the body, makes it supple, improves mobility and increases inherent stamina.
The Turkish getup is a controlled workout and several steps are involved, each with its own position, movement and benefit. When you train for your Functional Fitness Courses – PT Supremacy Training Certifications, do remember to master this workout as it is quite complex and can lead to injuries if not done properly. Practice it well till you can do it effortlessly before offering it to your clients.

How to do the Turkish getup

Although the Turkish getup is a complex movement, the best kettlebell courses teach you that you can break it up into individual positions to make it more manageable for your clients.

Do not rush through the workout; it should take you at least 30 seconds to complete the entire workout effortlessly and safely. More on online kettlebells qualification here!

Lie on your back and hold the kettlebell straight up in one hand. Move the other arm at 45 degree angle to the floor. Keep the arm holding the kettlebell straight at 90 degrees to the floor, do not bend wrist and keep your eyes fixed on the kettlebell.

Now bend your leg which is on the same side kettlebell turkish getupas the arm holding the kettlebell so that the knee is at 45 degree angle to the floor. The other leg stays outstretched and all throughout, the arm holding the kettlebell stays straight with your eyes never off the ball.

Next, sit up using the thrust of your arm lying on the floor. Rise first to elbow level and then rest on your palm. Push the arm holding the kettlebell into your shoulder socket and keep the other arm, on which you are resting, away from the ear.

Now dig the heel into the floor of the leg that is bent and thrust your hips upward till you achieve a full hip extension. The perfect position should be that there should be a straight line from the arm resting on the ground to the one holding the kettlebell. Open your chest and squeeze your glute muscles tightly.

Once you have achieved the straight line position, sweep the outstretched leg straight up till you are in a half-kneeling position. Remember to keep eyes fixed on the kettlebell throughout all these movements.

Now lift your hand off the floor and straighten your body by folding sideways by the waist. Take your eyes off the kettlebell and look straight ahead. Do not arch your lower back and keep your glutes tight.

Stand up using the thrust of your front heel and steady yourself. Once you are stable and the kettlebell is settled comfortably into the arm holding it straight up, you should begin the reverse movement and return to the starting position, following each step correctly.

The reverse movement is also quite complex and you should learn it very well during your kettlebell courses.

Personal Trainer Shares 3 Weight Loss Tips

personal trainer

Exercise

If you want to lose weight and get in shape then you must exercise at least 4 times per week. Hire a fitness trainer or health professional at Dangerously Fit Personal Training to write you a training program and be consistent with your effort, it won’t happen overnight but it will happen if you stick with the program.

Water intake

Since muscles are 72 pct water, a muscle that is hydrated is a muscle that is stronger. So ensure that you have enough fluids daily. Drink at least 16 ounces about an hour prior to working out. For every pound that you lose during the workout drink 24 ounces.
Taking the right advice
If you are not sure what foods are good to have for getting ripped, take the advice of a professional nutritionist. Some of the food you are eating presently which may not be good to achieve your goal can be substituted with the right type of healthy foods.

Dieting

A crash diet is one thing you need to avoid when exercising. Crash diets slow the metabolism down. Crash diets also make you look worn out and tired. You will be reluctant to run or walk. This will counteract the effect of having good abs. Avoid diet pills also ‘“ they will probably cause more harm to your body and counteract the good energy and nutrients.
Food intake vs time in the gym

Remember that when you work out you are achieving only about 15 pct of the ‘˜getting ripped’ equation. You could probably spend much more time shopping for food and preparing the same. The right diet will account for 85 pct. You should pay more attention to fiber as it will help in chiselling those muscles. Good fiber producing foods are vegetables, berries and legumes. A high fiber diet helps to lower the insulin levels as also achieve more weight-loss. This is a big step to getting ripped.

Kinds of Fitness Training That Help Improve Metabolism

Metabolism is the rate at which calories derived from your daily diet are burned by your body to release energy for basic life processes. Improving metabolism is the ultimate aim of weight watchers and regular exercisers everywhere because a high metabolic rate accelerates muscle growth and ensures fat burning at a faster pace. However, how fast your metabolism is depends on several factors such as your gender, age, genetic conditioning and your levels of activity. Although you cannot change your genes, gender or age; you can certainly boost a sluggish metabolism by exercising regularly at a group training maroubra.

Boosting your Metabolism

Regular exercise is the best and most effective way of improving a sluggish metabolism. This is because when you exercise consistently under the watchful eyes of a trained instructor at a bootcamp training in maroubra, you gradually develop more lean muscle mass and shed all those fat layers accumulated over the years. And research shows that every pound of your muscle consumes about six calories per day for basic sustenance whereas a pound of fat consumes only about 2 calories for the same activity. Understandably, your instructor at the bootcamp training in maroubra will put emphasis on those exercises that will definitely help improve your metabolic rate.

Strength Training or Resistance Training or Weight Training

This is one of the best ways of developing lean muscle mass. Such training commonly uses different techniques and equipments to increase your body’s stamina and build muscles through resistance against gravity. In fact, this type of training is extremely effective in maintaining high metabolic rate hours after your exercise session has ended because your muscles stay highly energized and activated throughout the day.

Your group training maroubra instructor will show you how to progressively increase the force output of your muscles through gradual increase of resistance and difficulty levels. Common equipments used in this type of training include dumbbells, barbells, weighted bars or weighted stacks.

High Intensity Interval Training (HIIT)

This is a super workout regimen that combines periods of high intensity exercise with bouts of rest intervals or low intensity workouts. And the best thing is that HIIT energizes your body to such an extent that you will continue to burn calories within even 36 hours after the end of your workout session.

Most group training maroubra offer highly effective HIIT modules for the participants wherein you can expect to combine different movements such as running, burpees, high jumps, squats, mountain climbing side planks and so on. Your instructor will design the modules interspersing these high intensity workouts with low intensity exercises such as jogging, high knees, using dumbbells or barbells, running at one place etc. for maximum benefit.

Aerobic Workouts

Aerobic or cardiovascular workouts may not contribute to muscle-building but are nonetheless super effective in boosting metabolism. This is because such types of workouts require you to breathe in copious amount of fresh oxygen during the workouts and this provides your body with an instant burst of energy that immediately spikes your metabolic rate. In fact, you will come across common aerobic workouts such as jogging, speed walking, sprinting etc at most bootcamp training in Maroubra.